
*Edited May 3, 2017: Please note, if you need your starting chain to be a specific length, this method does shorten the chain more than normal. Double check your length as you go!
Have you ever FINALLY finished an afghan only to think, “Crap I need to put a border on this to hide the foundation chain!”? I have, many, many times. Luckily, I was looking for coffee collar patterns and found THIS by Sheri Goad at Frogging Along. She starts the pattern by specifically telling you to crochet in the back loop of the chain. My first thought, “Why in the world would you do that?” Then, while trying to start it the first time, “This is a real pain in the butt.” When I finished the first one, “OH MY GOD THIS IS AMAZING!!!!!!!!!!!!!!!!”
Today I am going to share a picture tutorial to show how to do this, and don’t worry, it gets a lot easier after the first stitch. It also gets a lot faster the more you do it. We are going to start with just 10 stitches and use a single crochet, it’s small enough not to need a ton of yarn but long enough to start to get the hang of the technique.
Step 1
Tie a slipknot, and chain 10 just like you would normally do.

Step Two
Flip the chain over so you can see the backside of the chain.
Do you see how there is a horizontal bar of yarn going across the chains? This is the back loop of the chain.
Step Three
Insert your hook from the bottom to the top under the first horizontal bar you can find. Hint: there aren’t any extra chains needed using this technique, or at least my version of it, 10 chains, 10 single crochets by the end of the row.

Step Four
Yarn over, pull one loop through (two loops on hook). Yarn over and pull through both loops creating your first single crochet (ending with only 1 loop on the hook).

Step Five
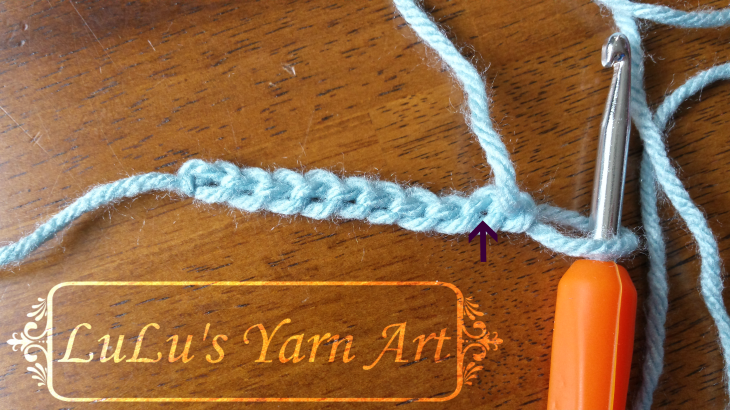
Repeat steps three and four until you have 9 completed single crochets. It should look like this:
By the end of the row the horizontal bar is hard to see. When you insert your hook, it now looks like the top of the chain. Make sure you only insert your hook through one of the loops in the chain. Yarn over, pull up one loop, yarn over and pull through both loops, completing your 10th single crochet.
Now to start the second row.
Step Six
Chain 1 and pull it tight. “What?” you say, trust me on this one, you’ll see in just a minute.

Step Seven
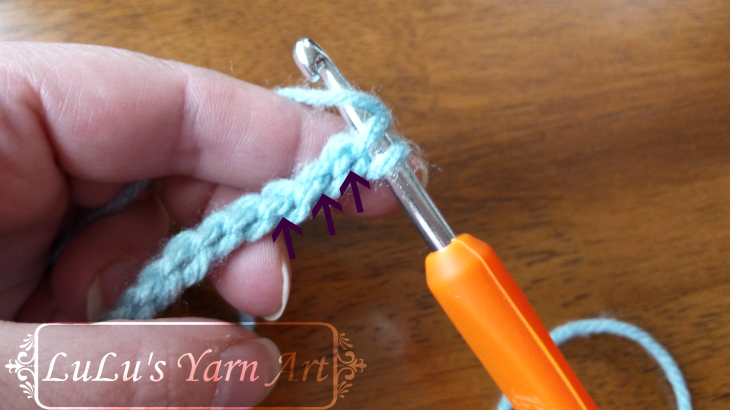
Insert your hook under both loops of the single crochet at the end of the last row. Yarn over, pull up one loop, yarn over and pull through both loops to create a single crochet. Continue doing this until you have completed 9 single crochets in the second row. Your piece should look like the image below.

Step Eight
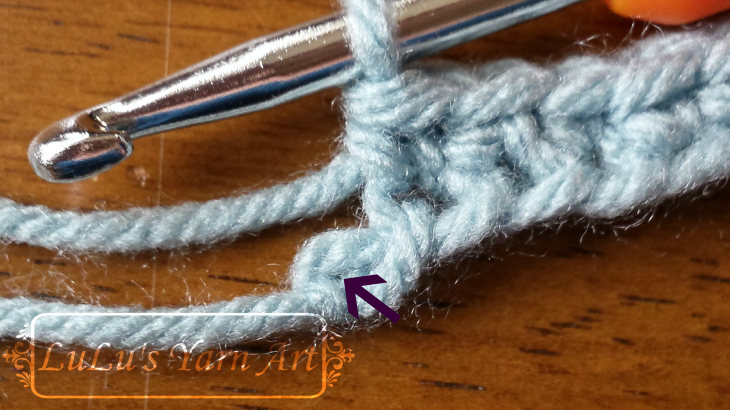
Insert your hook into the last space of row 1 (Pictured above). Make sure your hook passes under TWO strands of yarn. Yarn over, pull up one loop, yarn over, and pull through both loops.

Step Nine
Continue on your merry way until you have completed as many rows as you need for your project. You should be able to use this for any existing pattern, but remember, we only chained as many chains as we needed for the actual piece. We did NOT use turning chains. Check your pattern to see how many stitches you have at the end of the first full row and use that number as your guide.
Step Ten
Stand back and compare!


By The Way…
Remember how I said to trust me about tightening the chain 1 at the beginning of each row? I have found that this provides much cleaner edges, and a completed project that stays square much easier. You can say goodbye to rows that create a zigzag edge. I have found that it is pretty much essential to pull it tight using a single crochet with Bernat Blanket yarn. Otherwise I was getting loops at the beginning of each row that just looked unprofessional.
Love the technique but aren’t sure how to use it with a different stitch? Check back soon, that’s what I will be writing about next!

Great tip! I always try to work through the back loop of the starting chain too, but sometimes I forget – I only learned the back loop trick about a year ago and it’s hard to break the lifelong habit of just going to the top loop. It really does give a much cleaner edge to work with! 😀
LikeLike
I think the only time I will use the old way is if it is a dress where the skirt attaches to the starting chain. 🙂
LikeLike
This is a great tip! Crocheting through the back loop really does make a difference!
LikeLike
It really does! I am so glad that I found that pattern.
LikeLiked by 1 person
I’ve never heard of this technique before, I must give it a go!
LikeLike
I love it! Especially for blankets.
LikeLike
Yep, I tried it at the start of the kindle cosy I’m making and I’m definitely a convert!
LikeLiked by 1 person
Thanks for letting me know! Just watch out if you are using a bulky yarn and are aiming for a specific length, it seems to shorten the starting chain more.
LikeLike
Yeah I noticed that, but then the second row seemed to stretch it back again
LikeLike