
If you read my post A Better Starting Chain, then you know that I greatly prefer this method for starting just about any project, especially when I want a nicely finished edge. Lately, I have been doing quite a few projects that are worked in rounds. Maybe it’s just me, but I struggle to keep a starting chain from twisting. It seemed to be even worse when I would use the back loop of the starting chains; it was more obvious when it would twist and harder to correct. So after several attempts and repeated “froggings,” I decided I needed to work smarter, not harder. After the chain, I just turn the work and crochet the first “round” and join with a slipstitch. Much better! But then, when I got to the end, I wanted it to look like it was a round also. I have come up with a method that works pretty well for me, and I would like to share it with you today.
Step One

Hold your almost finished project so that it matches the image above. Thread your darning/tapestry needle onto the tail. Insert the needle into the last chain of your first row.
Step Two
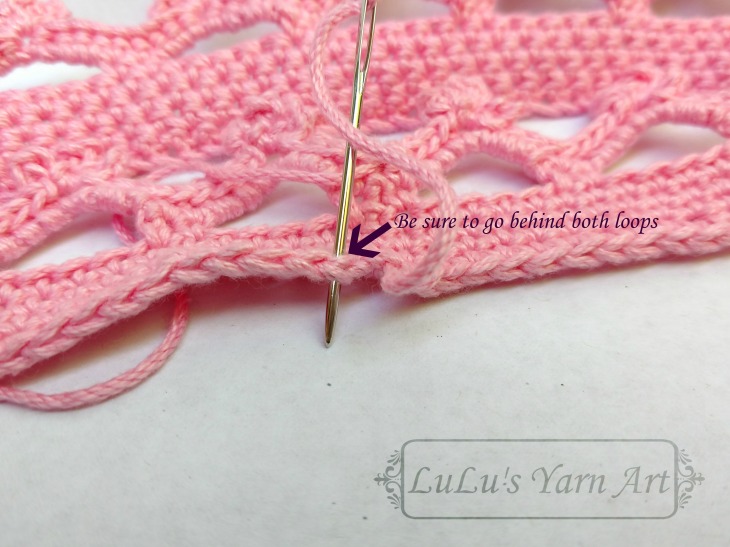
Make sure your needle is behind both loops of the chain. Pull the tail all of the way through.
Step Three

Insert the needle behind and under the knot, as shown above. Make sure the tip of your needle comes up between the top loops in the starting chain behind the knot. Pull through.
Step Four

Insert your needle back through your original knot. Note: it is very important to do these steps in order or when you pull your yarn tail back through the knot, it will untie your knot. Also, you will want to use the smallest needle you can for this step, especially if you are using thinner yarn.
Step Five
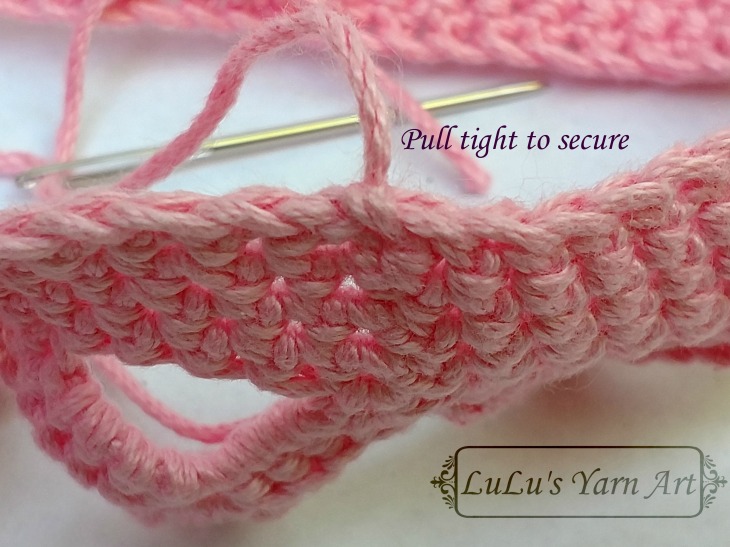
Pull tight to secure.
Step Six

Next, you will insert the needle to the right of the knot. Make sure that you stick it in between the loops of the chain. Continue to thread the needle through the centers of several rows of stitches. Finish weaving in the ends as normal.

Tada! This sample was done using Lion Brand® Yarns 24/7 Cotton® (I am loving this yarn…). I have previously used this method on acrylic yarn as well, and in the acrylic, the knot almost disappeared. Hopefully that saves you some of the trial and error I experienced! By the way, the pictures are for a pattern that I created for which I will soon be looking for testers. I need to take a few more pictures and then I will be making a formal announcement in the next few days!

This is a good method! It’s like embroidery to match the chain edge. I’ve done steps 1 through 5 kind of and step 6 never. I’ll copy your method. For eons I’ve been going under the loops of the chain instead of straight through the center. I think your method is far neater and less fidgety. Doing it the way I’ve always done it you can get a nice and neat finish, but your have to fudge a lot. With yours, you just pull on the yarn. Thank you so much!
LikeLiked by 1 person
Thanks Tony, I’m so glad you like it. Let me know if it works for you when you try it!
LikeLiked by 1 person
It’s always great to find a crochet hack that makes things easier and/or neater looking. 🙂
LikeLiked by 1 person
Thanks Yolanda!
LikeLiked by 1 person
Thanks for another neat trick Meghan!! I have a problem with twisting the chain too! It’s so frustrating when you realize it’s twisted! 😀
LikeLiked by 1 person
Thanks for the tip!
LikeLiked by 1 person
You’re welcome!
LikeLike